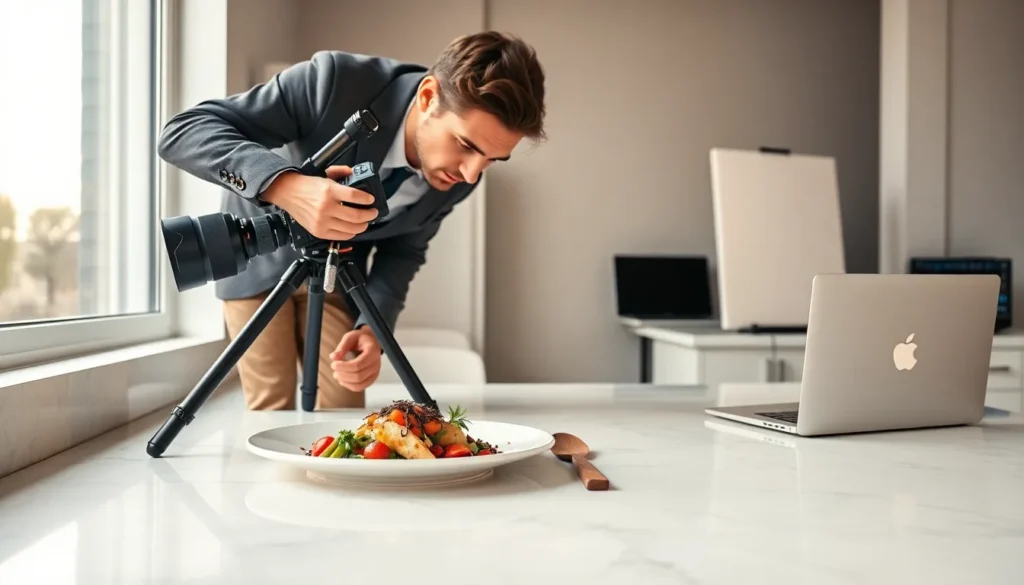
A great food photography guide can transform ordinary meal snapshots into scroll-stopping images. Whether someone shoots for a restaurant menu, food blog, or social media feed, the right techniques make all the difference. Food photography combines technical skill with creative vision. It requires understanding light, composition, and camera settings to capture dishes at their most appetizing. This food photography guide breaks down the essential elements every photographer needs to master. From lighting setups to editing workflows, these tips help create images that make viewers hungry.
Table of Contents
ToggleKey Takeaways
- Side lighting or backlighting near a window creates depth and highlights textures, making food look its most appetizing.
- Use the rule of thirds and shoot from multiple angles—overhead for flat lays, 45-degree for plated dishes, and eye-level for tall items.
- Set a wide aperture (f/2.8) to blur backgrounds for single dishes, or a narrower aperture (f/8–f/11) for sharp flat lay food photography.
- Keep ISO low (100–400) and shoot in RAW format for maximum editing flexibility and image quality.
- Style dishes with intention—highlight the hero element, use props sparingly, and work quickly before food loses its fresh appeal.
- Edit with restraint: adjust exposure and white balance first, then add subtle vibrance and sharpening to enhance without overdoing it.
Setting Up Your Lighting
Light makes or breaks food photography. It determines how textures pop, colors appear, and shadows fall across a plate. Professional food photographers often prefer natural light for its soft, flattering quality.
Side lighting works best for most food shots. Position the dish near a window so light hits it from the side or slightly behind. This angle creates depth and highlights textures like the crust on bread or droplets on fresh produce. Harsh midday sun creates unflattering shadows, so shooting during morning or late afternoon yields better results.
For artificial lighting, a single softbox or LED panel can replicate window light effectively. Place it at a 45-degree angle to the food. Add a white foam board on the opposite side to bounce light back and fill in shadows.
Backlighting is another powerful technique in food photography. It makes drinks glow, steam rise visibly, and sauces shine. Position the main light source behind the dish and use reflectors in front to prevent the food from going too dark.
Avoid overhead fluorescent lights. They cast green tints and create flat, unappealing images. Turn off room lights when shooting near windows to maintain consistent color temperature.
Styling and Composing Your Dishes
Food styling separates amateur food photography from professional work. The goal is to make dishes look fresh, appetizing, and intentional.
Start with the hero element. Identify the most photogenic part of the dish and position it facing the camera. For a burger, that might be a cross-section showing all the layers. For pasta, it could be a perfectly twirled forkful.
Props add context and visual interest. Use napkins, utensils, ingredients, and cutting boards to build a scene. But restraint matters, too many props distract from the food. Stick to a cohesive color palette. Neutral backgrounds like wood, marble, or simple plates let the food stand out.
The rule of thirds applies strongly to food photography. Place the main dish off-center for more dynamic compositions. Leave some negative space so the image doesn’t feel cramped.
Odd numbers work better than even ones. Three cookies look more appealing than four. A scattering of berries feels more natural than a perfect grid.
Shoot from multiple angles. Overhead shots (flat lay) work well for pizza, charcuterie boards, and table spreads. A 45-degree angle suits most plated dishes. Eye-level shots highlight tall items like stacked pancakes or layered drinks.
Freshness fades fast. Have everything ready before plating. Spray greens with water for a fresh-picked look. Replace wilted garnishes immediately. Work quickly, food has about a 15-minute window before it loses its appeal under lights.
Choosing the Right Camera Settings
Camera settings control how sharp, bright, and focused food photos appear. Understanding three key settings, aperture, shutter speed, and ISO, gives photographers full creative control.
Aperture affects depth of field. A wide aperture like f/2.8 creates a blurry background that isolates the food. This works great for single dishes where background blur adds drama. A narrower aperture like f/8 or f/11 keeps more of the scene sharp, which suits flat lay food photography with multiple elements.
Shutter speed matters less for stationary food on a tripod. But, capturing motion, like pouring sauce or sprinkling toppings, requires faster speeds around 1/250 or higher. Use slower speeds only with a stable setup to avoid blur.
ISO should stay as low as possible. Higher ISO values introduce grain that reduces image quality. ISO 100-400 works well in good light. Push it higher only when necessary, and plan to reduce noise in editing.
White balance ensures accurate colors. Auto white balance often works, but manual adjustment prevents color casts. Set it to match the light source: daylight for window light, tungsten for warm bulbs.
A tripod is essential for food photography. It allows lower ISOs, precise composition, and consistent framing between shots. Even inexpensive tripods dramatically improve image sharpness.
Shoot in RAW format instead of JPEG. RAW files contain more data, allowing greater flexibility in editing. They recover highlights, adjust colors, and correct exposure more effectively than compressed JPEGs.
Editing Your Food Photos
Editing polishes food photography and brings out its full potential. Even well-shot images benefit from adjustments in post-processing.
Start with exposure and white balance. Correct any brightness issues first. Adjust white balance to make whites look neutral and food colors appear accurate. Too warm makes food look orange: too cool makes it unappetizing.
Increase contrast slightly to add punch. Lift shadows to reveal detail in darker areas, but don’t overdo it, some shadow adds dimension. Pull down highlights if bright spots are blown out.
Saturation and vibrance make colors pop. Vibrance affects muted tones without oversaturating already-bright colors, so it’s usually the safer choice. A subtle boost makes food look fresher. Excessive saturation looks artificial and unappetizing.
Sharpening brings out textures in food photography. Apply it selectively to the food itself, not the background. Over-sharpening creates harsh edges and visible halos.
Remove distractions with spot removal or clone tools. Crumbs in the wrong place, fingerprints on plates, or dust spots on the background pull attention away from the food.
Crop thoughtfully. Tighten the frame to eliminate dead space, but maintain balanced composition. The rule of thirds still applies during editing.
Consistency matters for portfolios and social media feeds. Create presets or save editing settings to apply similar looks across a series of food photos. This builds a recognizable style.