Great food photography tips can transform a simple meal into a scroll-stopping image. Whether someone shoots for a restaurant menu, food blog, or Instagram feed, the right techniques make all the difference. Professional food photographers don’t rely on luck, they understand light, composition, and styling. This guide covers essential food photography tips that help anyone capture dishes that look as good as they taste. From mastering natural light to editing final images, these strategies work for beginners and experienced photographers alike.
Table of Contents
ToggleKey Takeaways
- Natural side lighting near a window creates depth and dimension, making food photography tips like this essential for appetizing shots.
- Neutral backgrounds and minimal props keep the focus on the dish while adding context and visual interest.
- Build height, use odd numbers, and garnish strategically to style food like a professional photographer.
- Choose your camera angle based on the dish—overhead for flat foods, 45 degrees for layered items, and straight-on for tall stacks.
- Edit with restraint by adjusting white balance, sharpening textures, and boosting colors slightly to enhance without overdoing it.
- Turn off artificial lights and stick to one natural light source for consistent, color-accurate food photography results.
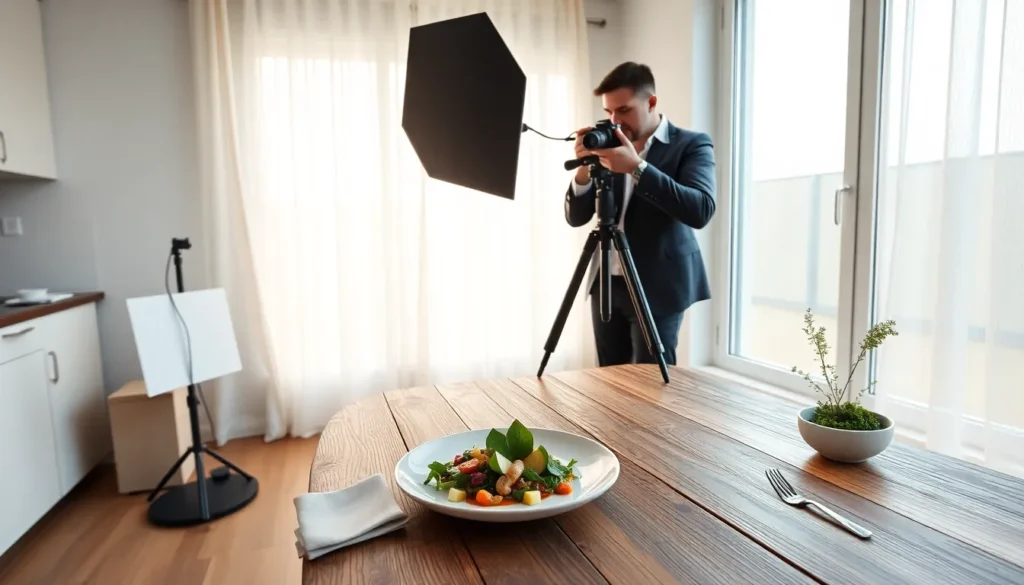
Master Natural Lighting for Appetizing Shots
Natural light is the secret weapon behind most stunning food photos. It creates soft shadows, brings out textures, and makes colors pop without artificial harshness.
Side lighting works best for food photography. Position the dish near a window so light hits it from the side. This setup creates depth and dimension that makes food look three-dimensional. Back lighting, where light comes from behind the dish, also produces beautiful results, especially for drinks and soups with translucent qualities.
Avoid direct sunlight. It creates harsh shadows and blown-out highlights that flatten the image. Instead, shoot on overcast days or use a white curtain to diffuse strong sun. A simple foam board or white poster works as a reflector to bounce light back onto shadowy areas.
The golden hours, shortly after sunrise and before sunset, offer warm, flattering light. Many professional food photographers schedule shoots during these windows for that coveted golden glow.
One practical food photography tip: turn off all artificial lights in the room. Mixing natural and artificial light creates color casts that are difficult to correct later. Stick with one light source for consistent, appetizing results.
Choose the Right Backgrounds and Props
Backgrounds and props set the scene without stealing attention from the food. They tell a story and create mood while keeping the dish as the star.
Neutral backgrounds work well for most food photography. Wood surfaces, marble slabs, and simple linen cloths add texture without distraction. Dark backgrounds make bright foods pop, while light backgrounds suit darker dishes. Keep a collection of backgrounds ready, even a $10 wood panel from a hardware store creates professional results.
Props should complement, not compete. Vintage silverware, ceramic plates, and fresh ingredients around the dish add context. A bowl of pasta looks more appealing with a scattering of fresh basil and a chunk of parmesan nearby. But restraint matters. Too many props create visual clutter.
Consider the color wheel when selecting props. Complementary colors, like orange carrots on a blue plate, create visual interest. Similar tones produce a cohesive, calming effect.
One overlooked food photography tip involves plate selection. White plates remain classics because they don’t compete with the food. Textured or colored plates work for specific shots but require more planning. Matte finishes photograph better than glossy ones, which create unwanted reflections.
Style Your Food for Maximum Visual Appeal
Food styling separates amateur snapshots from professional images. A few simple techniques make any dish look restaurant-worthy.
Freshness matters most. Wilted greens and melted cheese don’t photograph well. Prepare ingredients right before shooting. Many food photographers keep backup portions ready because dishes deteriorate under lights.
Build height and layers. Stack pancakes tall. Let sauce drip down the side of a cake. Arrange salads so ingredients show clearly rather than hiding beneath each other. Height creates visual interest and draws the eye.
Use garnishes strategically. A sprinkle of herbs, a drizzle of oil, or a dusting of powdered sugar adds finishing touches. These small details catch light and create focal points. Fresh herbs should look freshly picked, crisp and vibrant, not soggy.
Here’s a pro food photography tip: undercook pasta and vegetables slightly. They’ll hold their shape and color better during the shoot. Ice water stops vegetables from cooking further and maintains that bright green color.
Odd numbers work better than even ones. Three cookies look more appealing than two or four. Five berries beat six. This odd-number rule applies to most food arrangements and creates natural-looking compositions.
Use Angles and Composition to Tell a Story
Camera angle changes everything in food photography. Different dishes suit different perspectives, and composition guides the viewer’s eye through the image.
The overhead shot (90 degrees) works perfectly for flat dishes like pizza, salads, and cheese boards. It shows the entire spread and creates graphic, pattern-like images popular on social media.
The 45-degree angle mimics how people naturally see food at a table. It works well for most dishes and shows both the top and side of food. Burgers, sandwiches, and layered desserts shine at this angle because it reveals their height and layers.
The straight-on shot (0 degrees) emphasizes height and works best for stacked items, think towering burgers, layer cakes, and tall drinks. This angle makes food look substantial and impressive.
Composition rules apply to food photography just like other photography genres. The rule of thirds places the main subject off-center for dynamic images. Leading lines, a fork pointing toward the dish, a napkin edge, guide viewers’ eyes to the focal point.
Negative space deserves attention too. Empty areas around the dish give the eye room to rest and prevent crowded-looking images. Sometimes less truly is more.
A practical food photography tip: take multiple shots at various angles. The best angle often surprises photographers, and having options during editing saves time.
Edit Your Photos for a Polished Finish
Editing transforms good photos into great ones. Even professional photographers rely on post-processing to achieve their signature looks.
Start with basic adjustments. Correct white balance first, food should look natural, not yellow or blue. Slightly increase exposure if the image looks dark. Adjust contrast to make the dish stand out from the background.
Sharpening adds crispness to textures. That crusty bread and those glistening berries pop more with subtle sharpening. But go easy, over-sharpened images look artificial and harsh.
Saturation and vibrance bring out colors without making them garish. Boost these slightly for appetizing results. Red tomatoes should look red, green herbs should look green. But avoid pushing colors so far they look unnatural.
Crop for better composition if the original framing needs adjustment. Remove distracting elements at frame edges. Straighten tilted horizons, crooked images look unprofessional.
Lightroom, Snapseed, and VSCO offer excellent editing tools for food photography. Many photographers develop presets that create consistent looks across their portfolios.
One final food photography tip: edit with restraint. The goal is to enhance the photo, not transform it into something unrecognizable. Food should still look like food when editing is complete.