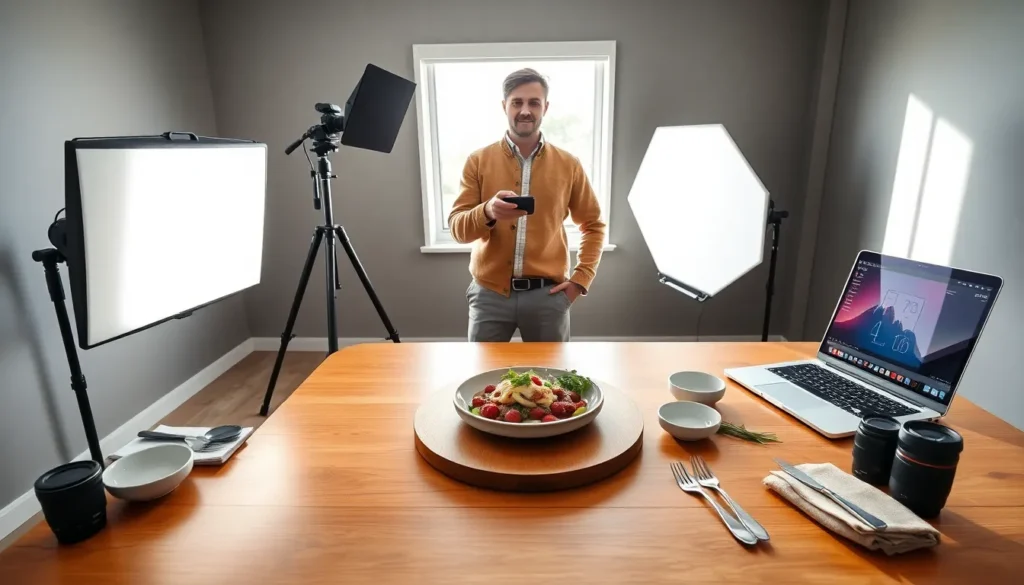
Great food photography tools can transform an ordinary dish into a visual masterpiece. Whether someone shoots for a restaurant menu, food blog, or social media, the right equipment makes all the difference. A well-lit plate of pasta or a perfectly styled dessert doesn’t happen by accident, it requires specific gear designed to capture textures, colors, and details that make viewers hungry.
This guide breaks down the essential food photography tools every photographer needs. From cameras and lenses to lighting setups and styling accessories, each piece of equipment serves a distinct purpose. Understanding these tools helps photographers build a kit that matches their budget and creative goals.
Table of Contents
ToggleKey Takeaways
- Essential food photography tools include cameras, lenses, lighting equipment, backgrounds, styling props, and tripods—each serving a distinct purpose in capturing appetizing images.
- Prime lenses between 50mm and 100mm work best for food photography, with macro lenses capturing fine details like water droplets and textures.
- Lighting shapes mood and texture—use diffusion panels and reflectors for natural light, or LED panels and strobes for full control regardless of conditions.
- Backgrounds like wooden boards, marble surfaces, and vinyl backdrops set the scene without distracting from the food itself.
- Styling props such as linens, vintage utensils, and scattered ingredients tell a story and elevate images from amateur snapshots to professional-quality work.
- A sturdy tripod with horizontal center column extension enables sharp overhead flat lay shots and hands-free operation during styling adjustments.
Camera and Lens Options
The foundation of any food photography toolkit starts with the camera. Full-frame DSLRs and mirrorless cameras remain popular choices among professionals. Models like the Canon EOS R5, Sony A7 IV, and Nikon Z6 deliver excellent image quality and dynamic range. But, crop-sensor cameras and even high-end smartphones can produce impressive results when paired with proper technique.
Lens selection matters just as much as the camera body. Prime lenses with focal lengths between 50mm and 100mm work best for food photography tools setups. A 50mm f/1.8 lens offers affordability and sharpness. An 85mm or 90mm macro lens captures fine details, think water droplets on fruit or the texture of fresh bread. Macro lenses also allow photographers to get close without distortion.
Aperture plays a critical role in food shots. Wide apertures (f/1.8 to f/2.8) create beautiful background blur that isolates the subject. Smaller apertures (f/8 to f/11) keep more of the scene in focus, which works well for flat lays and tablescapes. Most food photographers keep two or three lenses in rotation to cover different compositions.
Lighting Equipment
Lighting ranks among the most important food photography tools. It shapes mood, highlights texture, and brings dishes to life. Photographers typically work with natural light, artificial light, or a combination of both.
Natural Light Modifiers
Natural light produces soft, flattering results that many food photographers prefer. Large windows serve as the primary light source. But raw window light often needs modification to look its best.
Diffusion panels soften harsh sunlight and reduce contrast. A simple white sheet or professional diffuser placed between the window and subject creates even illumination. Reflectors bounce light back into shadow areas, filling in dark spots on the opposite side of the dish. White foam boards cost under ten dollars and work remarkably well as reflectors.
Black foam boards do the opposite, they absorb light and deepen shadows for dramatic effect. This technique adds dimension and prevents images from looking flat.
Artificial Lighting Setups
Artificial lighting gives photographers full control regardless of weather or time of day. Continuous LED panels and strobes both have their place in food photography tools collections.
Continuous lights let photographers see exactly how light falls on the subject in real time. LED panels with adjustable color temperature (measured in Kelvin) allow precise matching to ambient conditions. Brands like Aputure and Godox offer reliable options at various price points.
Strobes and speedlights deliver more power than continuous lights. They freeze motion and work well in mixed lighting environments. A single strobe with a large softbox can mimic window light convincingly. Many professionals use the Profoto B10 or Godox AD200 for portable studio-quality results.
Backgrounds and Surfaces
Backgrounds and surfaces set the stage for every shot. These food photography tools establish mood, complement colors, and provide context without distracting from the main subject.
Wooden boards remain a staple choice. They add warmth and rustic character to comfort foods, baked goods, and farm-to-table concepts. Photographers often collect boards in different finishes, weathered gray, dark walnut, and light oak each create distinct vibes.
Marble and stone surfaces suit elegant presentations. A slab of white marble elevates desserts, cheeses, and cocktails. Concrete textures work well for modern, minimalist aesthetics.
Vinyl and paper backdrops offer convenience and variety. Companies sell printed surfaces that replicate wood, tile, fabric, and other materials. They roll up for easy storage and cost far less than authentic materials. A collection of five or six backdrops covers most shooting scenarios.
Neutral colors generally perform best. White, cream, gray, and muted earth tones let food remain the star. Bold backgrounds can overwhelm the dish or clash with certain ingredients.
Styling Props and Accessories
Props bring food photography to life. They tell a story, add context, and create visual interest beyond the plate itself. Building a prop collection takes time, but certain items prove universally useful.
Linens and napkins soften compositions and introduce texture. Natural fabrics like linen and cotton photograph better than synthetic materials. Neutral tones and subtle patterns work across multiple shoots.
Utensils add a human element. Vintage silverware, wooden spoons, and chopsticks suggest the meal is about to be enjoyed. Partially eaten food or a bite taken from a cookie makes images feel authentic rather than staged.
Small dishes, bowls, and ramekins hold ingredients and garnishes. Ceramics in matte finishes reduce unwanted reflections. Thrift stores and estate sales offer affordable options with character that new items sometimes lack.
Herbs, spices, and scattered ingredients build atmosphere. A few basil leaves, a sprinkle of flour, or a drizzle of olive oil adds movement and freshness. These details separate amateur snapshots from professional food photography tools work.
A styling kit should also include tweezers, small brushes, paper towels, and spray bottles. Tweezers position tiny elements precisely. Brushes remove crumbs. Spray bottles add moisture that makes produce look freshly washed.
Tripods and Stabilization Gear
Tripods belong in every serious food photographer’s arsenal. They enable sharp images at slow shutter speeds, consistent framing between shots, and hands-free operation during styling adjustments.
A sturdy tripod with a center column that extends horizontally allows overhead shots. This feature proves essential for flat lay compositions where the camera points straight down at the table. Ball heads offer quick adjustments, while geared heads provide precise control for fine-tuning angles.
Tripod height matters too. Food photography tools setups often happen on low tables or countertops. A tripod that adjusts down to two feet or lower accommodates these situations. Some photographers use tabletop tripods for quick social media content.
Remote shutter releases prevent camera shake during exposure. Wireless remotes and smartphone apps trigger the shutter without touching the camera. This small accessory makes a noticeable difference in image sharpness, especially in low-light conditions.
Tethering software connects the camera to a laptop or tablet. Photographers can review images on a larger screen immediately after capture. This workflow speeds up the editing process and helps catch problems before the setup gets dismantled.