
Food photography for beginners doesn’t require expensive equipment or years of training. A smartphone, some natural light, and a few basic techniques can transform ordinary meals into scroll-stopping images. Whether someone wants to start a food blog, grow their Instagram following, or simply capture dinner before it gets cold, this guide covers everything they need to know.
The difference between an amateur snapshot and a professional-looking food photo often comes down to a handful of decisions. Lighting angle. Plate placement. Background choice. These small adjustments create dramatic results. This article breaks down the essential gear, lighting strategies, composition rules, styling tricks, and editing basics that turn food photography beginners into confident shooters.
Table of Contents
ToggleKey Takeaways
- Food photography for beginners doesn’t require expensive gear—a smartphone, natural light, and basic techniques can produce professional-looking results.
- Side lighting or backlighting from a window creates depth and dimension, while front lighting should be avoided as it flattens food.
- Use the rule of thirds and choose your angle based on the dish: overhead for flat foods, 45 degrees for plated meals, and straight-on for tall stacks.
- Style your shots with fresh ingredients, height, and complementary props, but always prep your setup before the food arrives to capture it at its best.
- Edit subtly using free tools like Snapseed or Lightroom Mobile—adjust exposure, white balance, and sharpness without over-saturating colors.
- Develop a consistent editing style across your food photography to build a recognizable brand and cohesive portfolio.
Essential Gear You Actually Need
Here’s the good news: food photography for beginners doesn’t demand a massive investment. Many successful food photographers started with nothing more than a smartphone.
Camera Options
A DSLR or mirrorless camera offers more control, but modern smartphones capture stunning food images. The iPhone 15 Pro or Samsung Galaxy S24 Ultra, for example, produce sharp, vibrant photos that work perfectly for social media and blogs. If someone already owns a decent phone, they should start there.
For those ready to upgrade, entry-level cameras like the Canon EOS Rebel T8i or Sony a6400 provide excellent value. A 50mm prime lens (often called a “nifty fifty”) creates beautiful background blur and costs under $200.
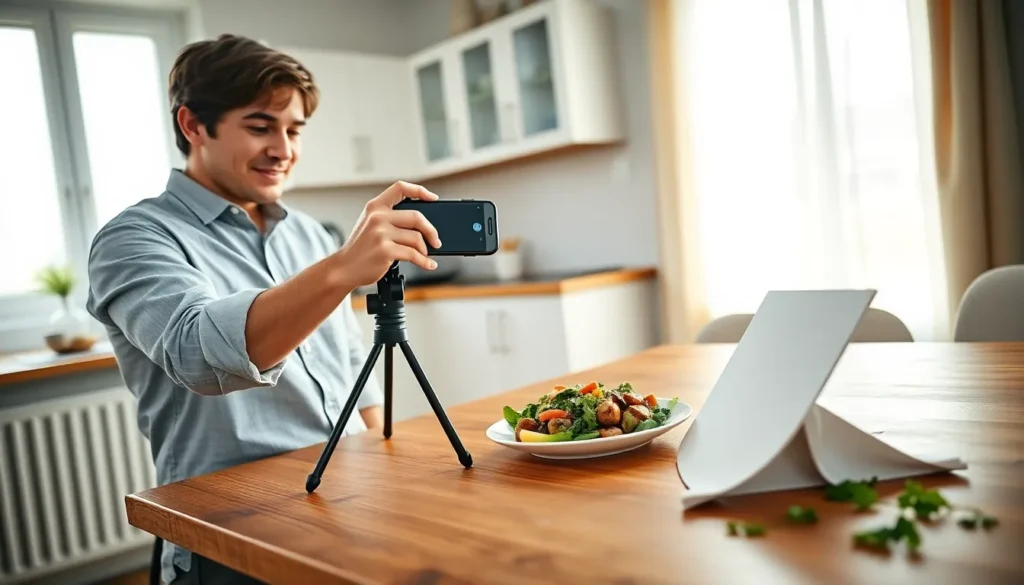
Tripod
A tripod changes everything. It eliminates camera shake, allows for consistent angles, and frees up both hands for styling adjustments. Tabletop tripods work well for overhead shots, while full-size tripods handle side angles better. Budget around $30-100 for a reliable option.
Backgrounds and Surfaces
Food photography backgrounds don’t need to be fancy. A weathered cutting board, marble tile from the hardware store, or simple white poster board creates professional results. Many food photography beginners collect various surfaces over time, wood textures, slate tiles, linen napkins, to match different moods and cuisines.
Reflectors
A white foam board from any craft store costs about $3 and works as a reflector to bounce light onto shadowy areas. This single tool dramatically improves lighting quality.
Mastering Natural Light
Natural light makes food look appetizing. Artificial overhead lighting, the kind found in most kitchens, casts harsh shadows and creates unflattering color casts. Window light solves both problems.
Finding the Right Window
North-facing windows provide soft, consistent light throughout the day. South-facing windows offer brighter light but may need diffusion during peak hours. A sheer white curtain or even a white bedsheet taped over the window softens harsh sunlight.
Light Direction Matters
Side lighting (light coming from the left or right of the dish) creates depth and dimension. It highlights textures, the crispy edge of a cookie, the glistening surface of a sauce. Backlighting (light behind the dish) adds a beautiful glow, especially for drinks, soups, or anything translucent.
Front lighting (light facing the dish directly) tends to flatten food and eliminate shadows. Food photography beginners should avoid shooting with windows behind them.
The Golden Hours
The hour after sunrise and before sunset produces warm, golden light that makes food glow. Overcast days create naturally diffused light, perfect for shooting all day without harsh shadows.
Using Reflectors
When light comes from one side, the opposite side falls into shadow. Positioning a white foam board on the shadowy side bounces light back onto the dish. This simple technique adds dimension without additional equipment.
Composition Techniques That Work
Good composition guides the viewer’s eye and makes photos feel intentional. Food photography for beginners becomes much easier once these foundational rules click into place.
The Rule of Thirds
Most cameras and phones display a grid overlay that divides the frame into nine equal sections. Placing the main subject along these lines, or at their intersections, creates a more dynamic image than dead-center placement. A bowl of soup positioned at the left intersection, for instance, feels more engaging than one perfectly centered.
Choosing Your Angle
Three angles dominate food photography:
- Overhead (90 degrees): Perfect for flat dishes like pizza, salads, or arranged spreads
- 45 degrees: Works well for most plated dishes, showing both the top and side
- Straight-on (0 degrees): Ideal for tall items like burgers, layer cakes, or stacked pancakes
The food itself often dictates the best angle. Flat dishes look boring from the side. Tall stacks lose their impact from above.
Negative Space
Empty space around the subject isn’t wasted space. It draws attention to the main dish and gives the eye a place to rest. Cramming too many elements into a frame creates visual chaos.
Odd Numbers Win
Three cookies look better than four. One main dish with two supporting props creates visual harmony. Something about odd numbers feels balanced to the human eye.
Styling Tips for Appetizing Images
Styling separates good food photography from forgettable snapshots. Small details make food look fresh, delicious, and worth eating.
Prep Before Shooting
Food photography beginners often make the mistake of shooting too slowly. Hot dishes cool down. Ice cream melts. Greens wilt. Smart photographers set up the shot completely, camera position, lighting, props, before the food arrives on set.
Fresh Ingredients Pop
Herbs should look vibrant, not droopy. Water droplets on fruit suggest freshness. A drizzle of olive oil adds shine to pasta. These finishing touches take seconds but elevate the final image.
Build Height and Layers
Flat food photographs flat. Stacking ingredients, adding height with a folded napkin underneath, or piling extra toppings creates visual interest. A burger looks more impressive when the layers are visible and slightly messy.
Props Support, Not Distract
Utensils, napkins, scattered ingredients, and vintage dishes add context and warmth. But props should complement the main dish, never compete with it. If the eye goes to the antique spoon before the soup, something’s wrong.
Color Theory Basics
Contrasting colors make food pop. A red strawberry stands out against a blue plate. Green herbs brighten brown dishes. White plates provide a safe, neutral canvas that works with almost everything.
Basic Editing for Better Results
Even well-shot photos benefit from editing. A few adjustments can transform a decent image into a standout one.
Free Tools That Work
Snapseed (free for iOS and Android) handles most food photography editing needs. Lightroom Mobile offers more advanced controls with a free tier. VSCO provides beautiful preset filters. Desktop users often prefer Adobe Lightroom or Capture One.
Essential Adjustments
Most food photos need the same basic tweaks:
- Exposure: Brighten slightly if the image looks dark
- White balance: Correct any color casts so whites look truly white
- Contrast: Add punch without making shadows too dark
- Saturation: Boost colors gently, overly saturated food looks unnatural
- Sharpening: Apply lightly for crisp details
Keep Edits Subtle
Food photography for beginners sometimes goes overboard with filters and adjustments. The goal is to make food look real and appetizing, not neon-colored or artificial. If someone wouldn’t eat it in real life, dial back the edits.
Cropping for Impact
Cropping removes distracting elements and tightens composition. A tighter crop on the main dish often improves an otherwise mediocre shot. Most editing apps allow cropping to standard aspect ratios (4:5 for Instagram, 16:9 for websites).
Develop a Consistent Style
Successful food photographers maintain a recognizable look across their images. This might mean consistently bright and airy photos, moody dark backgrounds, or warm earthy tones. Consistency builds a cohesive portfolio and personal brand.